Contact Us
If you still have questions or prefer to get help directly from an agent, please submit a request.
Popular topics: Multilogin X, Multilogin 6,
-
Retrieving the token Using the automation token in a workspace Retrieving profile, folder, and workspace IDs Retrieving the user ID Selenium automation example Playwright automation example Puppeteer automation example Logging in to Multilogin automatically Setting up automatic cookie collection Auto-launching the agent Exporting proxy details from profiles Converting external proxy lists into API-ready JSON files Automation FAQ
-
Error: Failed to get IP data: can't connect through proxy Error: Javax.crypto.badpaddingexception: pad block corrupted Status: Update in progress...Loading (1) of 2 components Error: Fingerprint composition failed Connection error due to non-Latin characters in Windows username Error: Mimic/Stealthfox executable is not found Multilogin 6 browser profile shows "Error" in status Can't launch a profile in Multilogin 6 JavaScript error when switching to dark mode in Multilogin 6 Common errors and solutions in Multilogin 6
Getting started with Postman
Written by Yelena Varabyeva
Updated on July 27th, 2024
Table of contents
Setting up Postman
- Download and install Postman
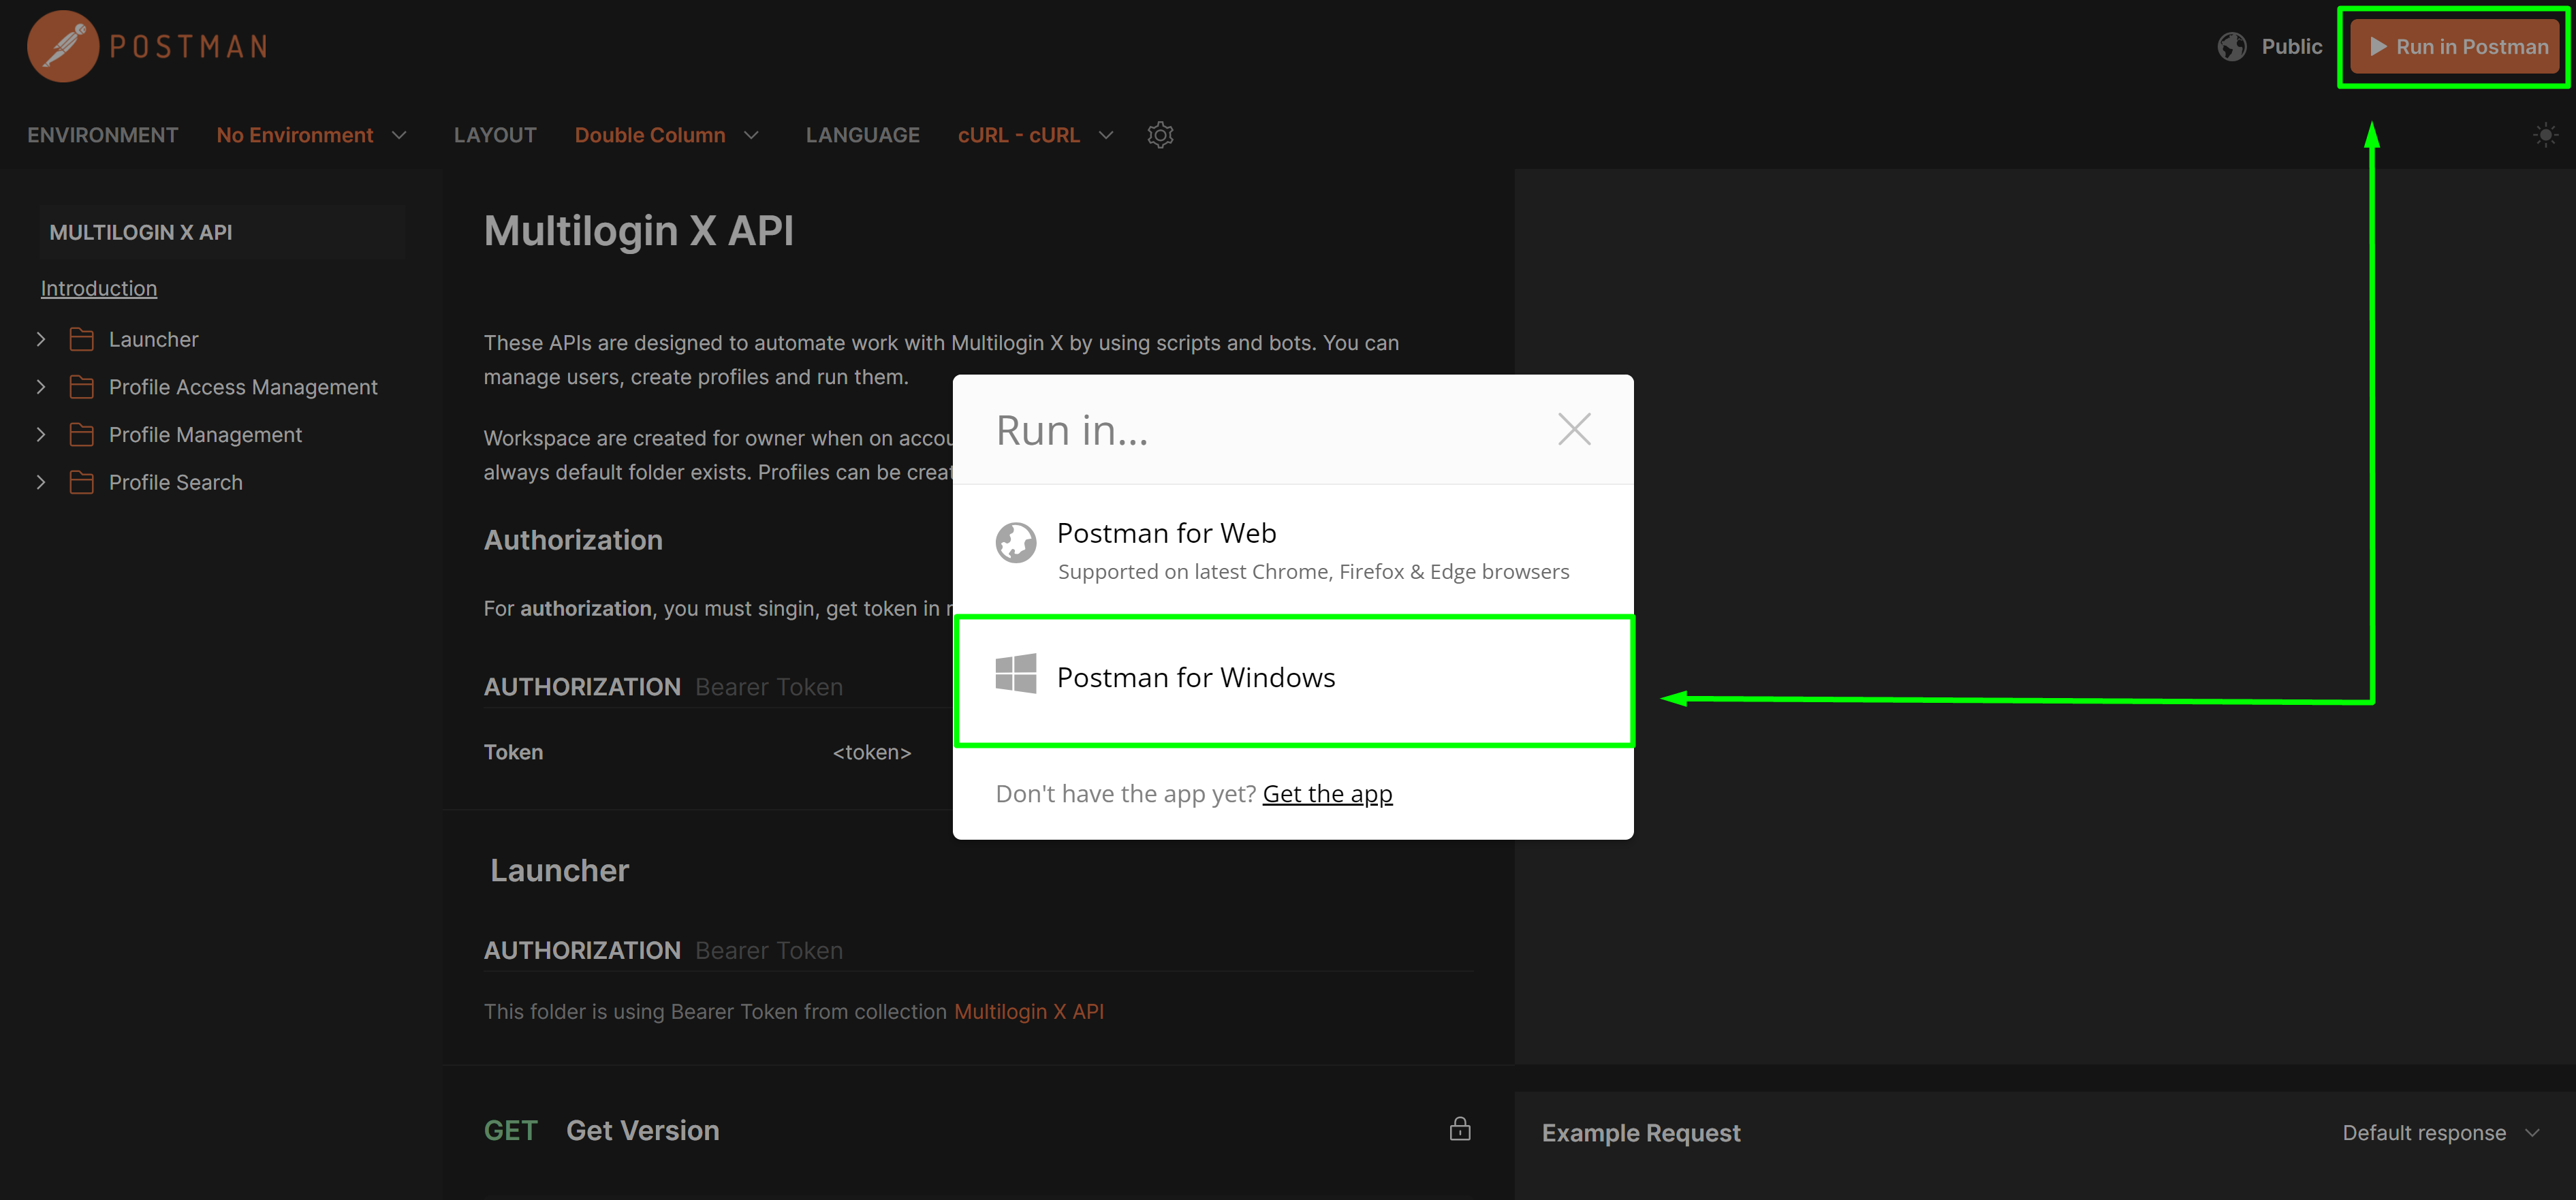
- Go to Multilogin X API documentation and click "Run in Postman" in the top-right corner
- Select "Postman for <your OS>"

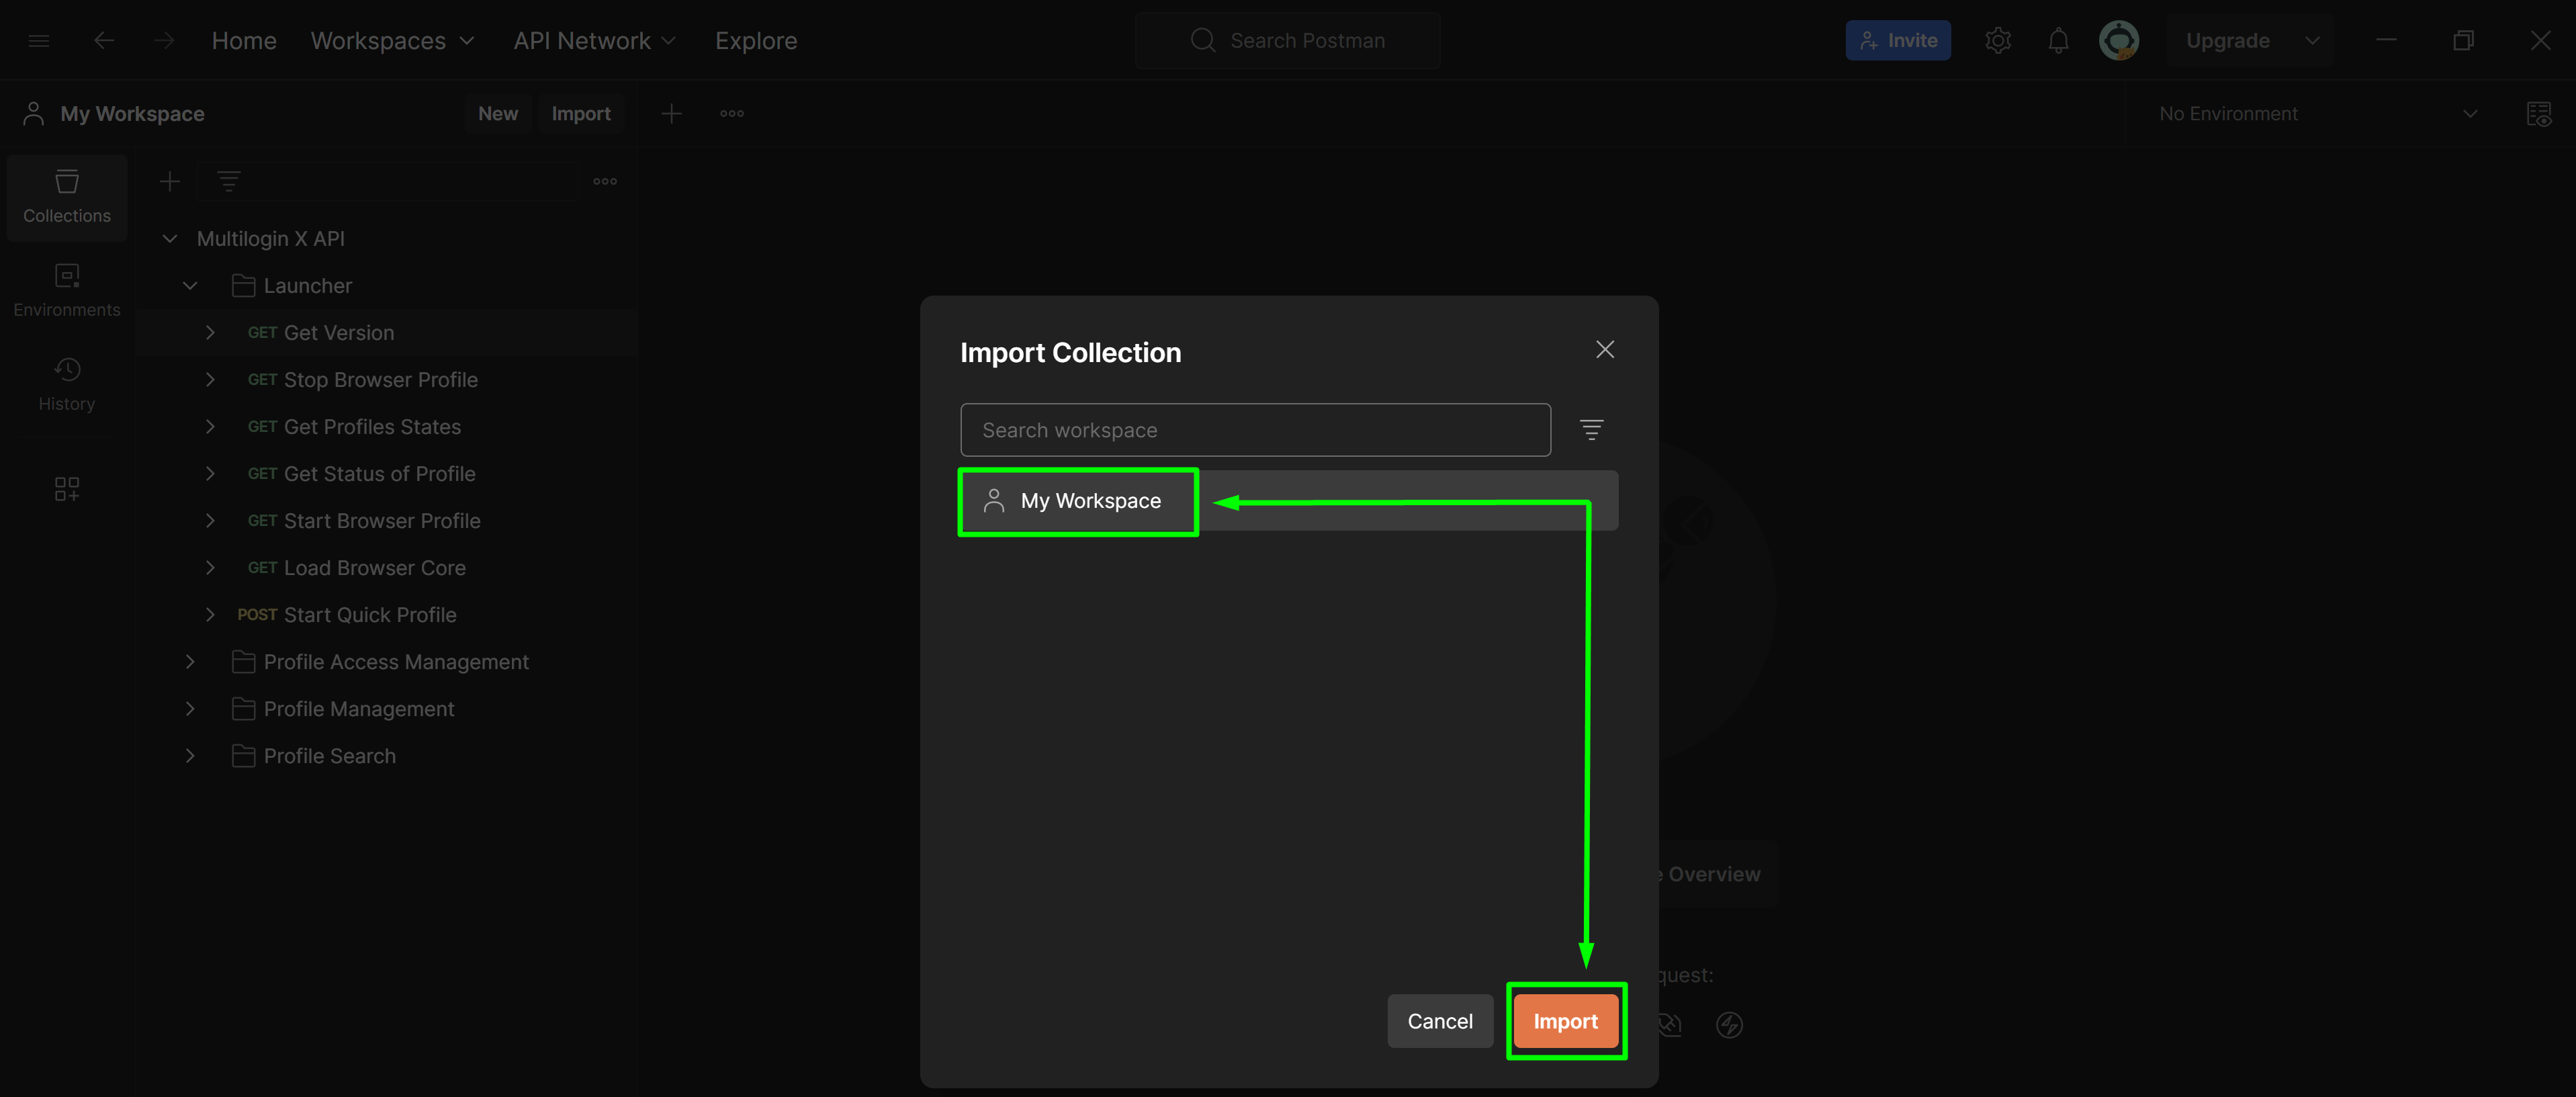
- In the "Import collection" window, select your workspace and click "Import": this will copy all the requests into a workspace on your computer

You can also use the web version by choosing "Postman for Web" in step 3; or manually create a collection with requests in Postman by clicking "New" → "Collection" and giving it a name.
Signing in
Here you will learn how to convert your password and sign in to your Multilogin X account.
- Visit MD5 Hash Generator and convert your Multilogin X account password
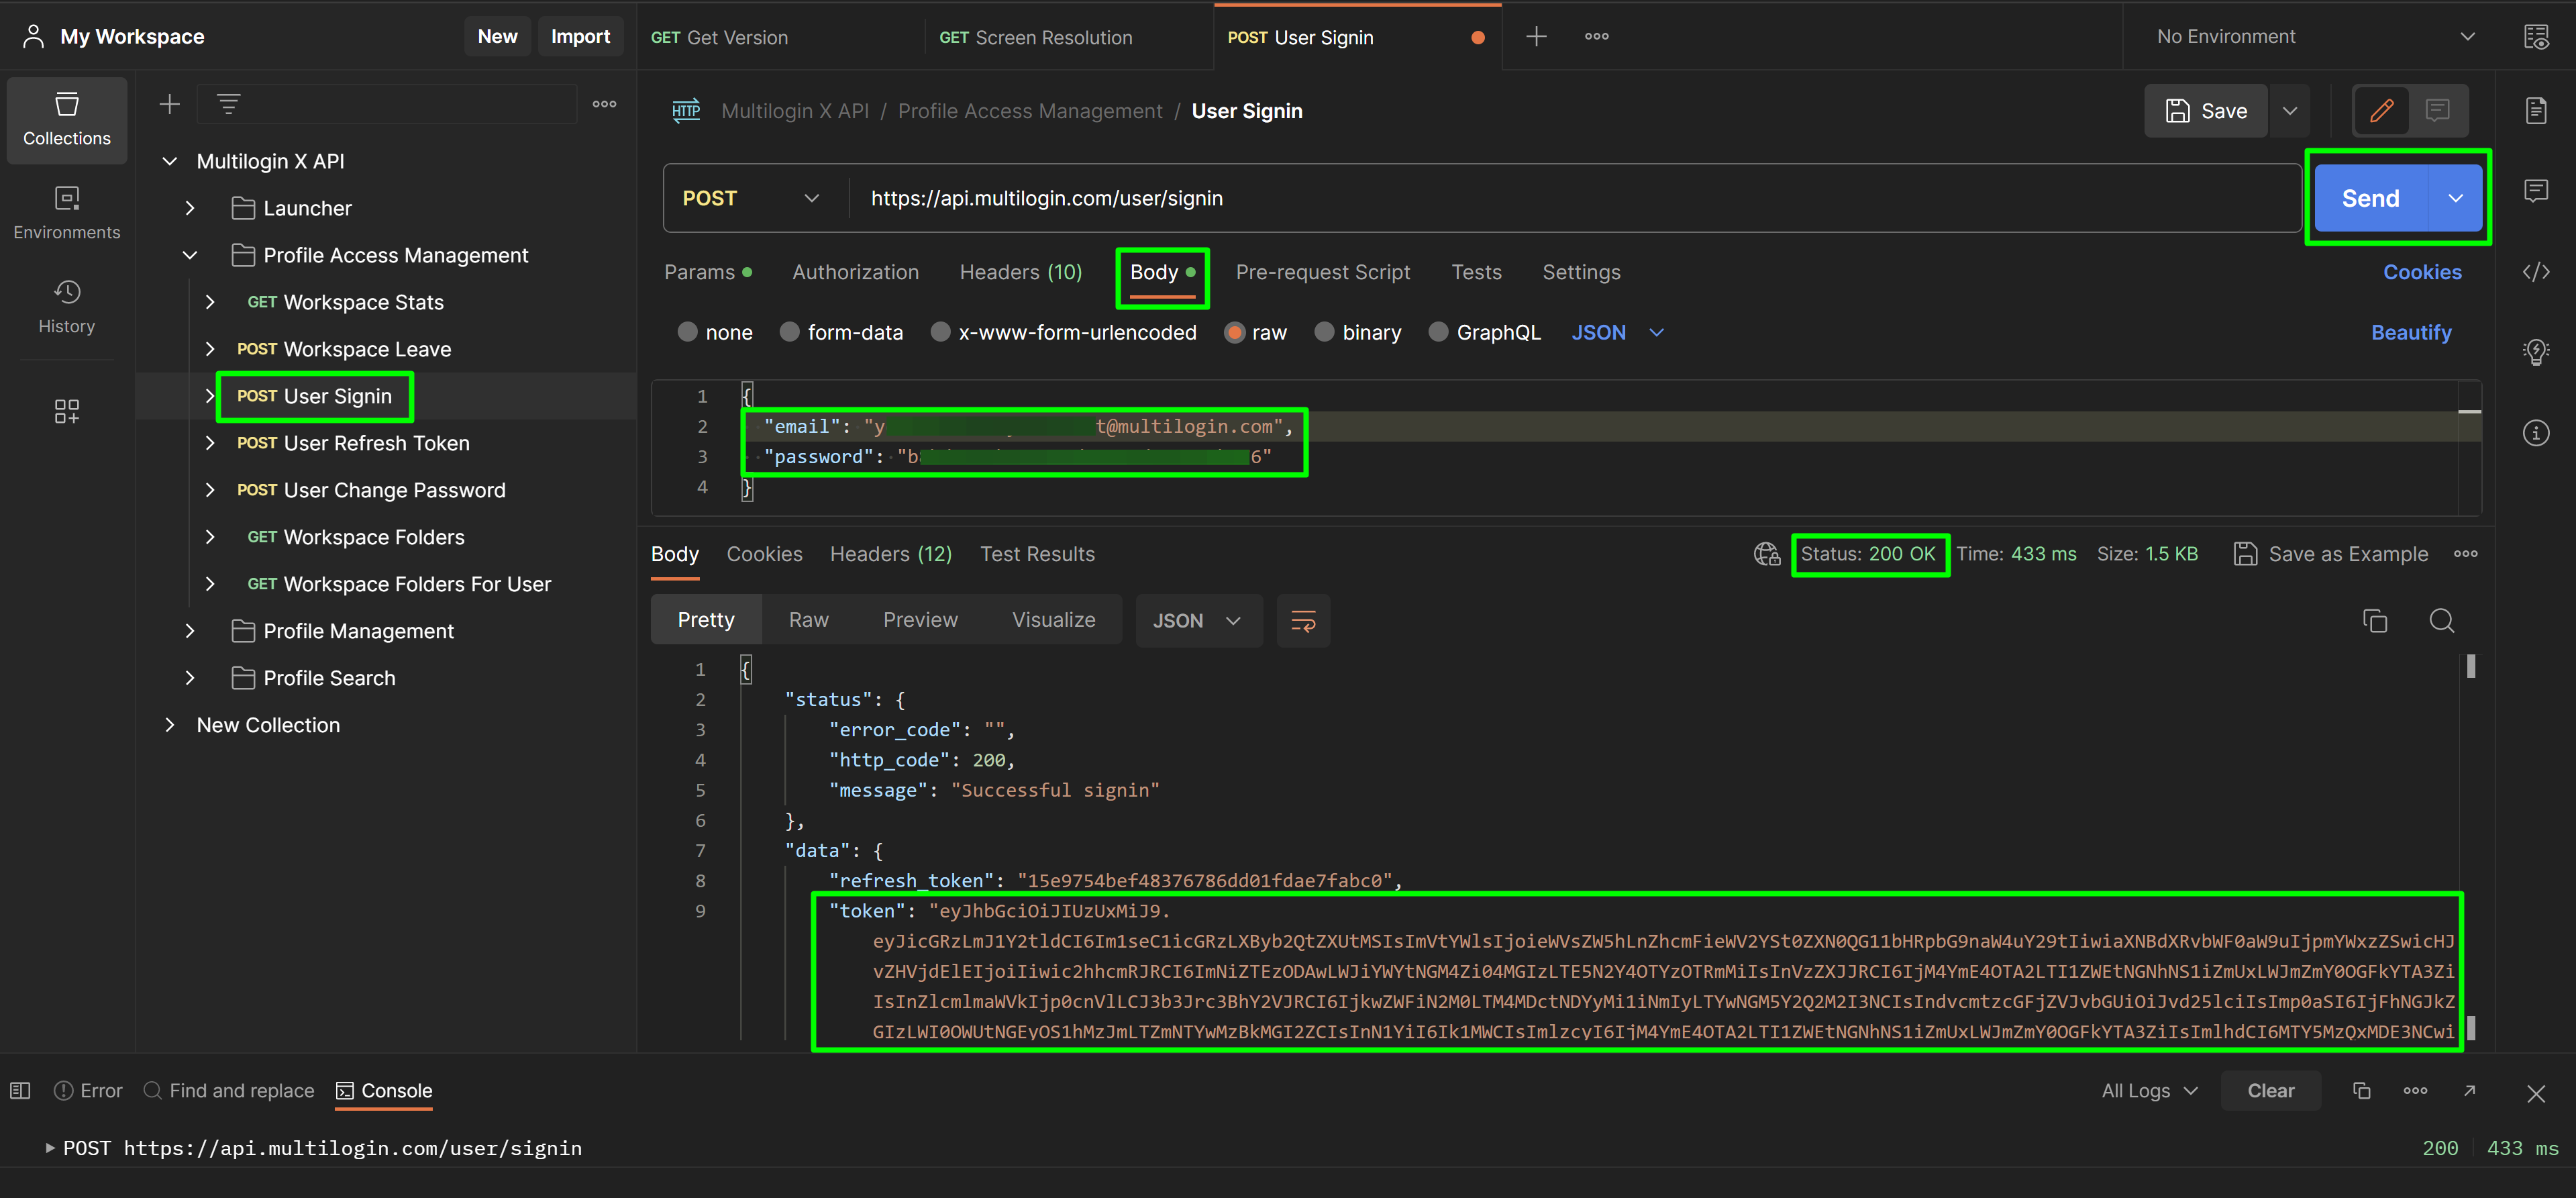
- Navigate to the "Profile Access Management" folder in your Postman workspace and select "POST User Signin"
- In the "Body" section, put in your Multilogin X account email and password hash generated in Step 1
- Click "Send" to execute the request: a "200" status means success

You will need the value of the token attribute to run further requests in Postman.
The token expires in 30 minutes. You can refresh it with the "User Refresh Token" endpoint. Also you can use the automation token and specify the required expiration period yourself (not available in the Starter plan).
Using the bearer token
For the majority of requests in Postman you will need to use the bearer token. Here's how you can put its value automatically into each request.
- Go to the "Scripts" section in the "POST User Signin" request
- Add the following code and save the changes:
const response = pm.response.json()
const token = response.data.token
pm.collectionVariables.set("token", token)
- Complete the steps from the “Signing in” section of this article

- Go to the main collection page "Multilogin X API" and switch to the "Authorization" section
- Specify the values below and save changes:
-
Bearer tokenfor "Type" -
{{token}}for "Token"
-
When you use other requests, the token value will pull up automatically to the "Authorization" section of each request.

 Multilogin X
 Multilogin 6